Thursday, October 13, 2011

FINALLY-- an update!

Dear faithful readers,

It has been approximately four months since I last posted an update about my knitting. I did post in August, but that was just a pattern. This time, you're going to get a loooong post jam-packed full of the exciting knitting things that are happening in my little world.

Let's start at the beginning. I started and finished a pair of socks from Knitty in my first month in Israel:


They're pretty. I haven't worn them. I never remember until after I'm finished and have a beautiful pair of socks that there's NO POINT TO MAKING A BEAUTIFUL PAIR OF SOCKS. When in the world am I going to wear them? With sneakers? So pointless. I guess they're good for "around the house", so that visitors who drop by can admire them, but otherwise... I just don't get it. I don't know why I made them. At the same time, they were pretty fun to make and I really liked the colorway.


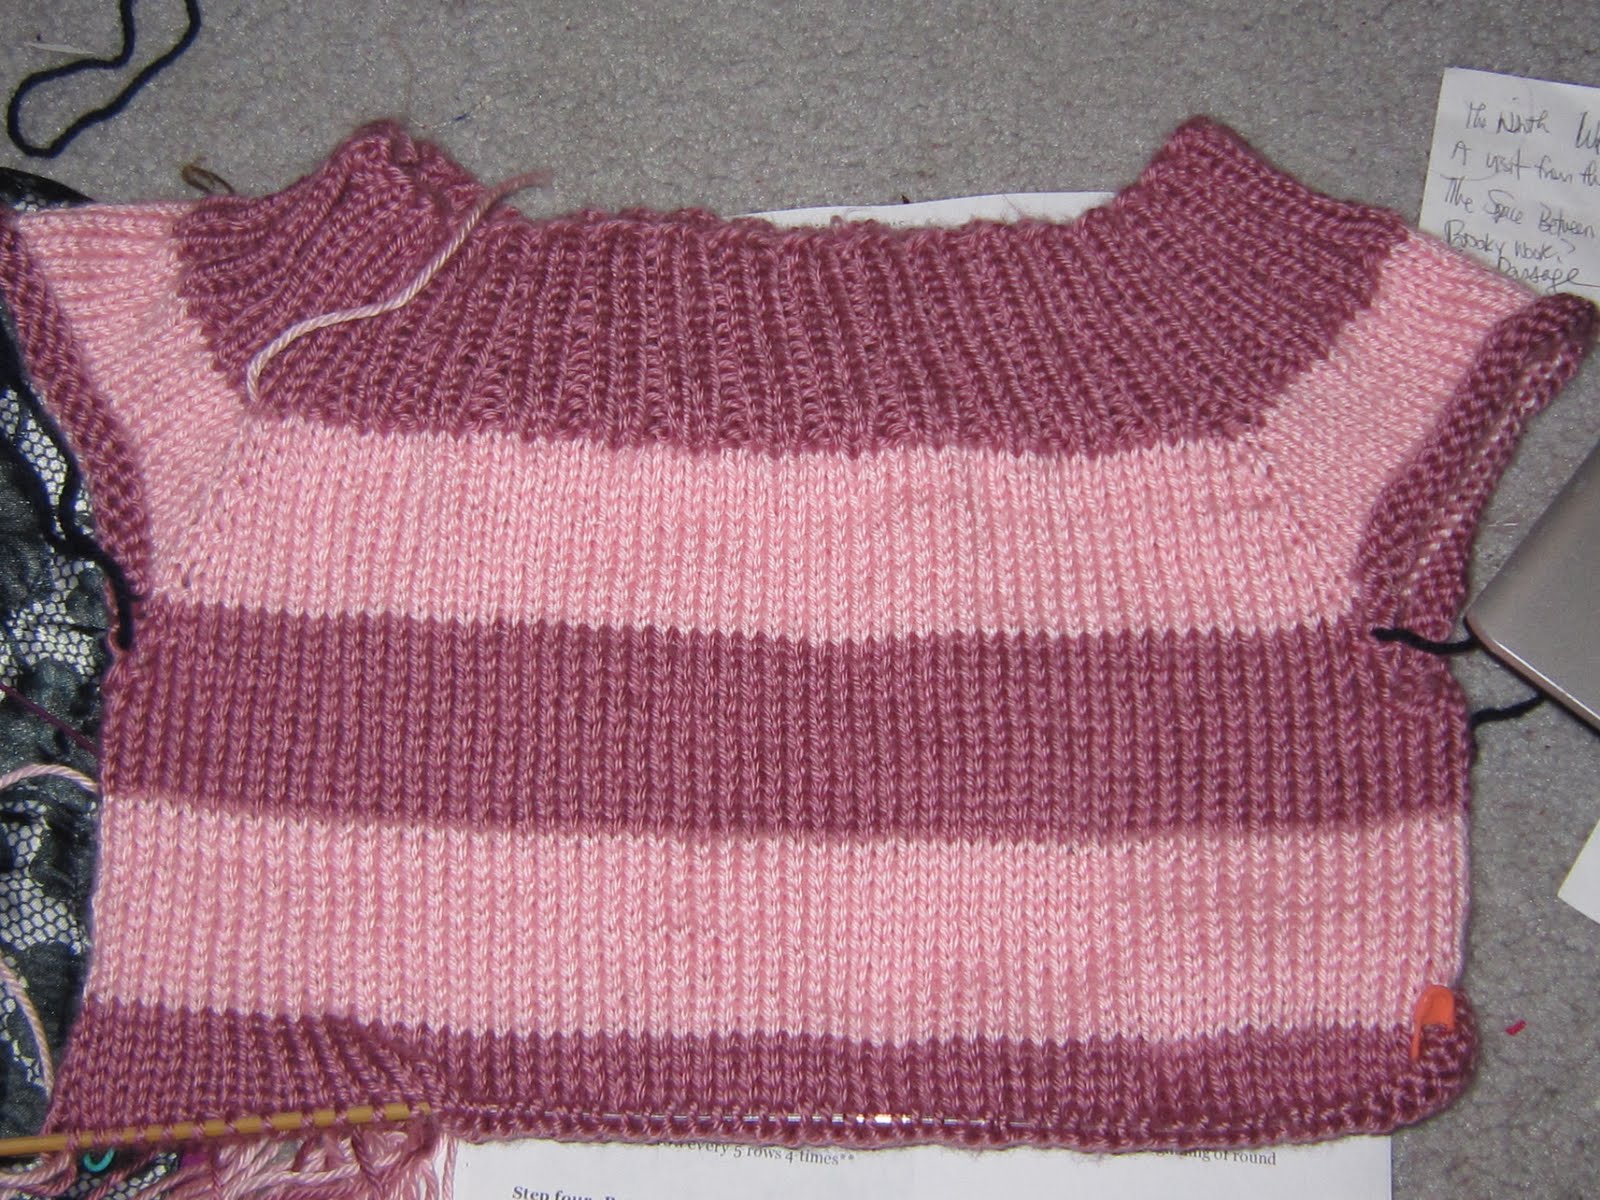
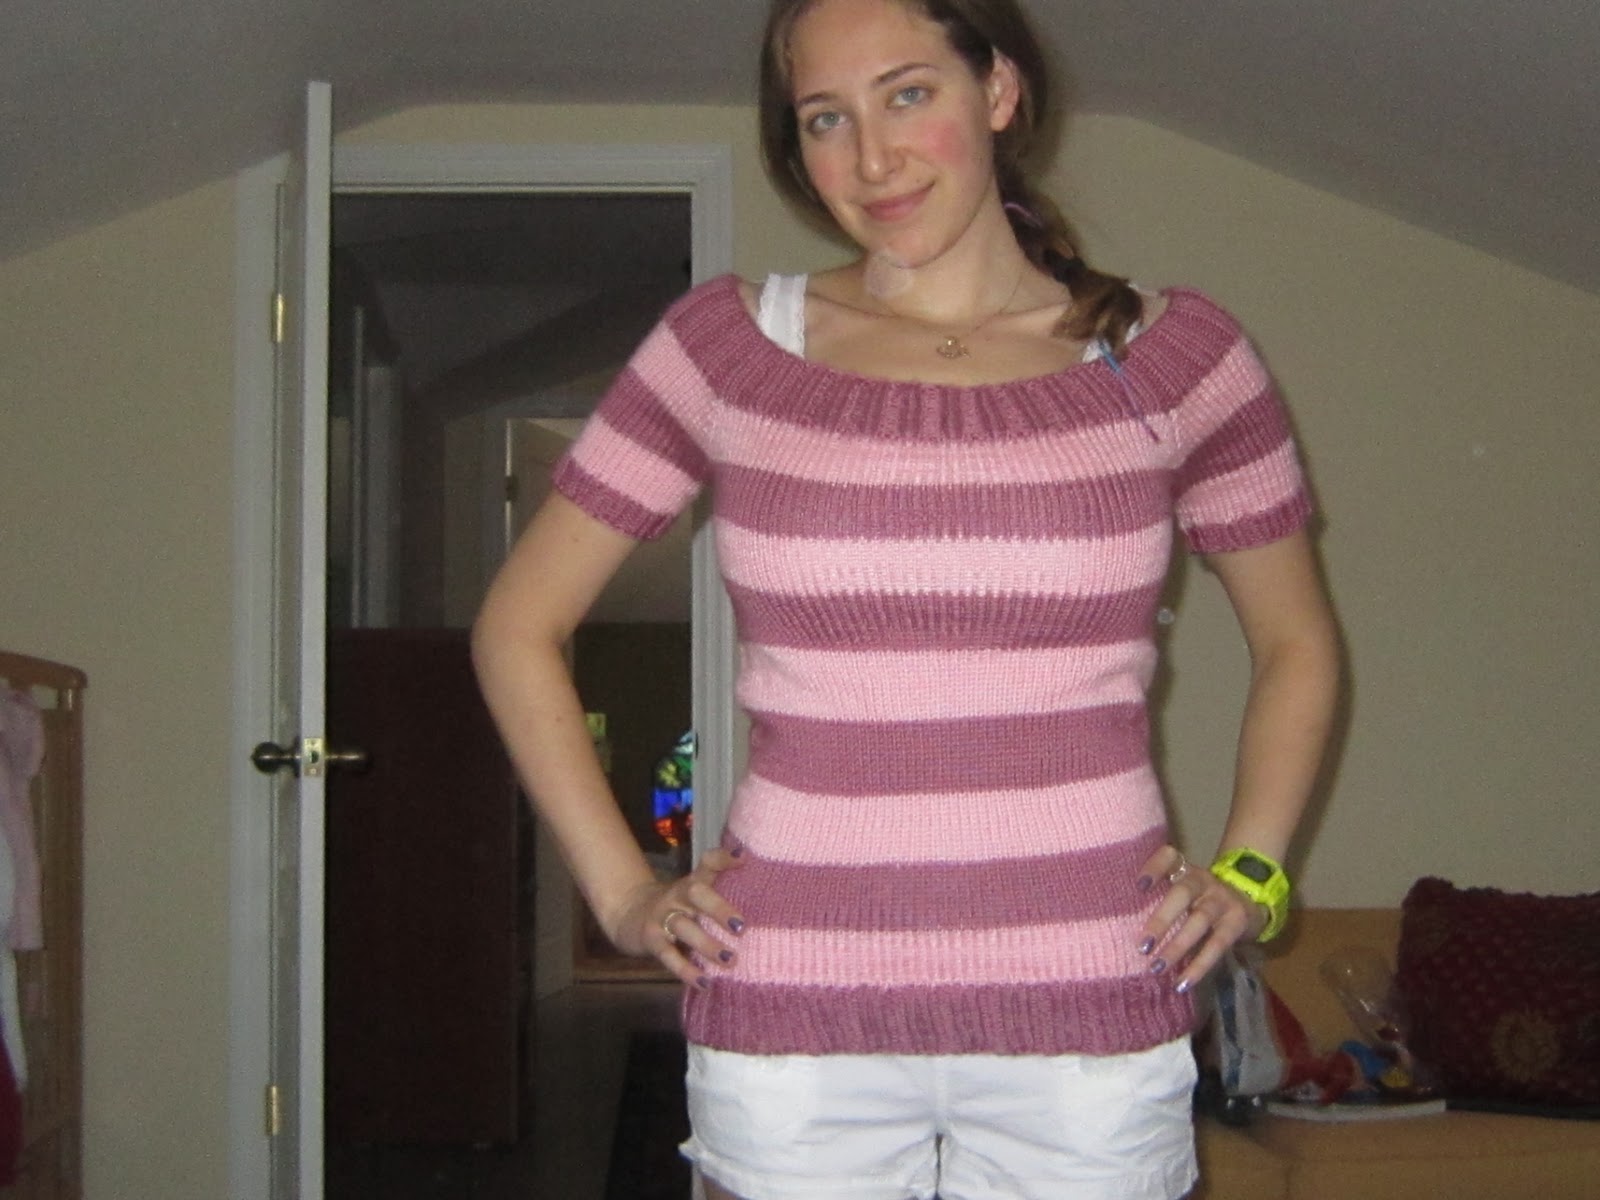
The striped raglan.... Oh, the raglan.

At one point, it was finished:


But it didn't fit so well.


I had put in some "bust" and "waist" shaping that ended up a little confused about itself and as you can see, there are some weird bulges where there clearly shouldn't be. I pretended to myself that it was okay, and I could sort of pull and twist the sweater around so it wouldn't show, but it just didn't look good. A few months later I ripped it out up to the armholes and started again. This time I increased twice on each side every other row for about twenty rows. Needless to say, it came out ridiculously huge and fit terribly again. Ripped. This time I increased ONLY on the front, which I thought would be sufficient room but still snug-fitting. I knit almost all the way down to the bottom before trying it on and realizing it was still too big, still weirdly baggy in the bust, still ill-fitting. Rip. We're now back at the armholes. The status of the project is, frankly, iffy. I have knit this sweater three times. And I don't know when the inspiration to do it all over again will hit.


Next. This project was completed in mid-July, while I was waiting on my friend to deliver her baby:


Simple hat-- my own pattern, nothing special--I may post it at some point-- and the cutest little socks. Sadly, Michelle (the mother of the baby boy) says that his feet are already too big for them!! He was born in August, and by the time the "cold" weather came around, he'd outgrown them. Guess I'll have to make some more. They were really fun and quick. The only thing is that babies don't really like to wear socks. Actually, it's pretty difficult to knit for babies, it turns out. They grow so freaking quickly. Anyway, here's a picture of baby Eitan in the hat at nine weeks:


He's adorable to a slightly ridiculous degree. Michelle keeps making "jokes" about how I'm going to "steal" him one day. Ha, ha.


Next project: I made a Nalgene cozy/carrier for my friend's husband, who requested it for his hiking trips:


This is before I finished it, weaved in all the ends, sewed on the strap, etc. I don't have a finished picture because I'm too lazy to take one. For the strap, I just did garter stitch, but I held the strand of wool together with a strand of cotton to reduce elasticity. But it didn't really do that. I sewed the strap to the opening of the cozy and the bottom of it, but I don't know how to avoid it falling out if you're carrying it across the chest. Probably if you fastened the cap of the Nalgene around the strap, it would stay in. I knit it really quickly because I wanted to get it to them before they left for a seven-week trip to India, but I wasn't able to, sadly. So it's still in my room somewhere and I guess I'll deliver it when they get back.


Next. I got some amazing, exciting news: my cousin is having twin boys! They're due in January, so unfortunately I won't be seeing them in their adorable infancy, since they live in New York and I'm in Jerusalem, but I have some family visiting next month so I decided to knit them up some matching sweaters to send back. A few months ago I found a pretty decent yarn store in Jerusalem. Not a ton of stuff, but the selection they do have is pretty good. I went there and got some color-changing acrylic for the baby sweaters. I found a very basic pullover pattern and altered it to add some cables. Each sweater only took a few days, and they are super-adorable:


I shall post my alterations.... at some point. I was going to say "shortly", but let's be realistic.

Just to make sure the sweater was a good size for a baby, because it seemed a little wide, I tried it on Michelle's baby boy at six weeks:


Perfect fit, with a little room to grow! Too cute! Now she wants one as well... Knew it would be dangerous to use him as a sweater model.


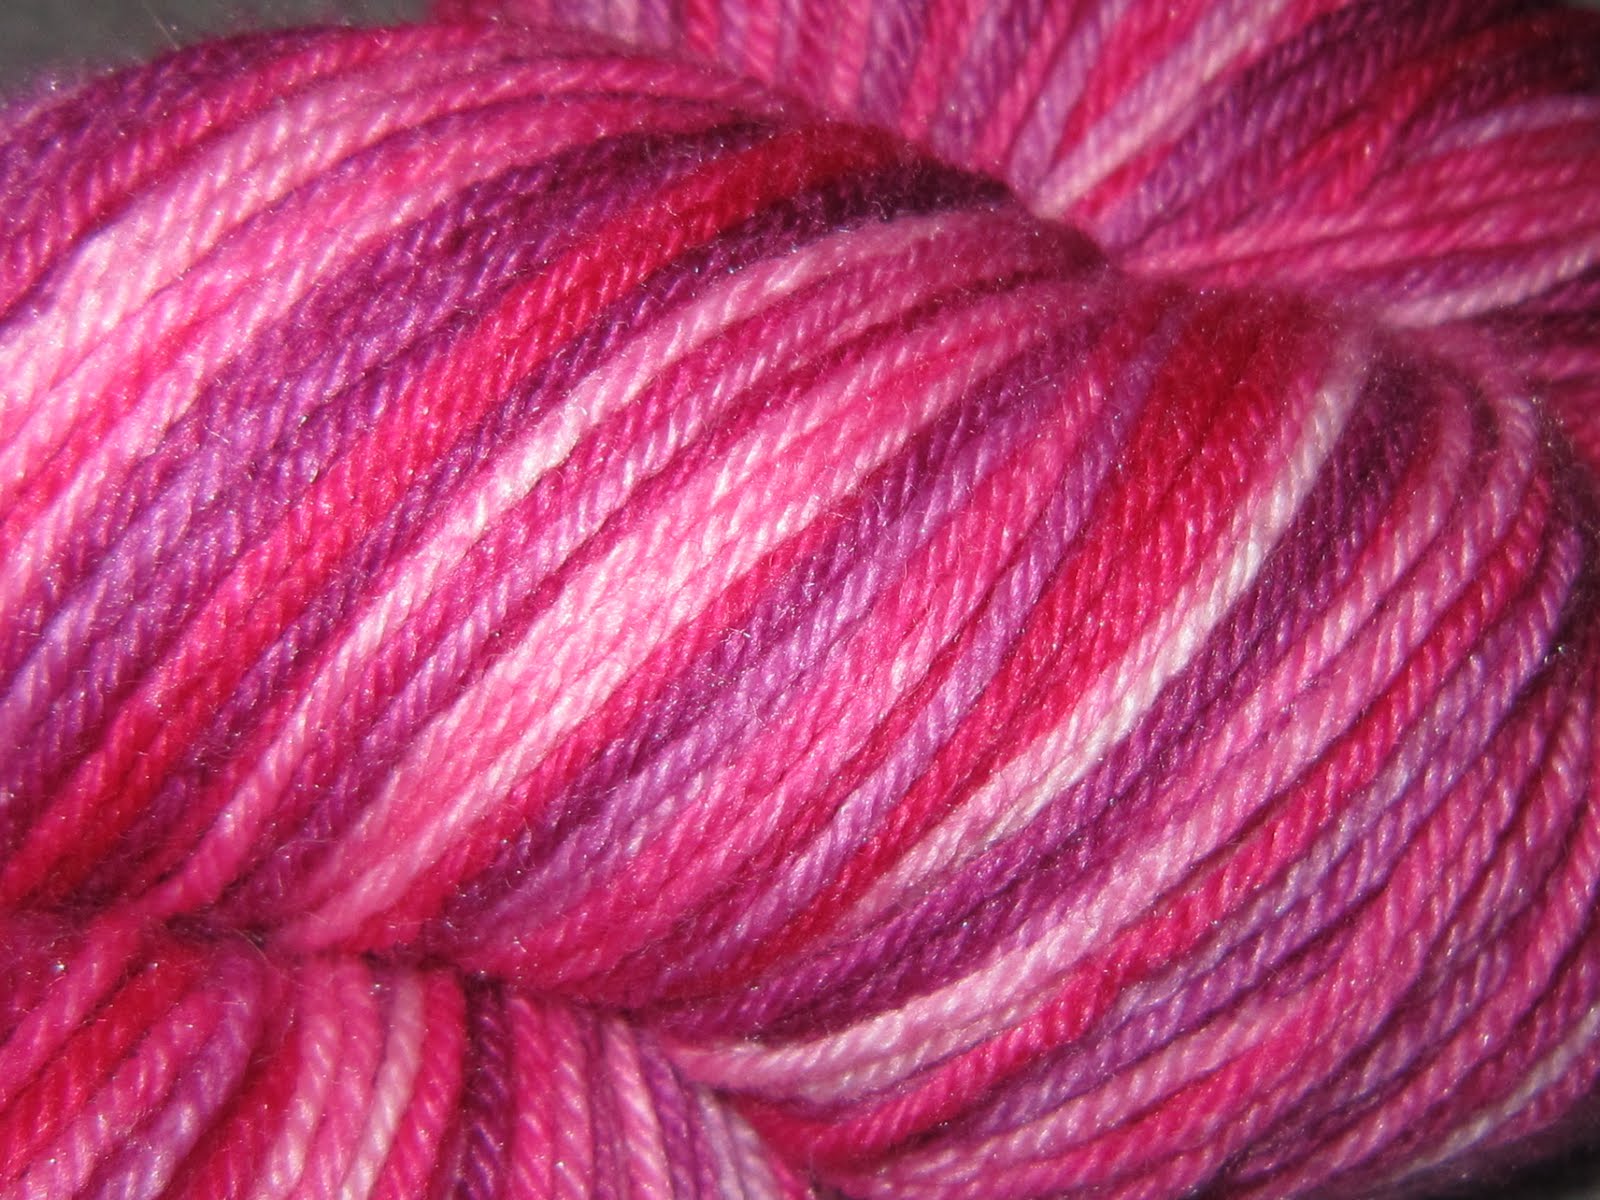
For Rosh HaShana I went to my Efrat host family's house, and as Rachel is really into knitting, she sort of re-ignited my own excitement. She had lots of current knitting magazines from the states and I went through them and picked out a bunch of patterns to photocopy. I jumped right in with a pullover hoodie sweatshirt which is not even on Ravelry yet. Here's my progress so far:


I bought the yarn at that same little shop. It was expensive. Let's leave it at that. I had to buy 13 balls! But it's a lovely yarn, a wool and cashmere blend in a dusty rose. Really soft and nice to work with, good stitch definition, and looks like it will have a nice soft drape. It's a cute hoodie. The pattern is written to be worked flat in pieces, but I just cast on the body in the round, because, why not? I despise seams. It's a pretty simple sweater-- same pattern the whole way through, then you add a hood and a front pocket. I haven't done much on it because I've been working on the baby sweaters but hopefully it'll pick up pace soon.

And the latest, a silly little thing, I'm working on a little case for my prayer book. I always take it with me when I go away for Shabbat but it gets tossed around in my bag so I'm making it a nice little cozy. But I don't know how it will turn out:


We shall see how that turns out.

One last knitting-related project: I made myself some classy stitch markers! I got the idea from a knitting book I glanced through while at Rachel's, and my roommate happens to work at a crafts store, so I headed on down there and bought some metal rings and little charms to hang on them. Back at home I twisted all the little rings together with pliers and this was the result:


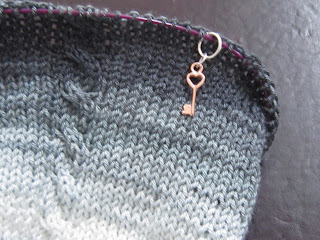
Aren't they cute? I love them. My usual stitch markers are just yarn in contrasting colors, tied in tiny loops. They usually unravel after a while. I also have a few plastic ones, but they're too big. These are just perfect. I may make some more if I find more cute charms.


And that's all, folks! I also started making another jewelry stand, but I didn't like the colors so I never finished it. I'll rip it out soon and start over. "Soon." And I am really going to try to post those mods for the baby sweaters. It shall be done!!!

Monday, August 15, 2011

Simple Ribbed Kindle Cozy


Simple Ribbed Kindle Cozy with Elastic Band

Abra Forman 

This is a very simple, very quick ribbed case for the Amazon Kindle, but instead of a button flap or closure, this cozy features an elastic band sewn in at the opening so you can simply slip it in and go with no possibility of it falling out and no need to fasten it closed. The Amazon cover with backlight is great but gives the Kindle significant extra weight, and when you go out during the day and know you won’t need the light, a secure cozy does just fine and weighs a lot less. Just a few quick hours of knitting and your Kindle is fully protected from bumps and scratches!
Skills Needed
Knitting in the round

Measurements
Empty (Unstretched): 10” in length, 2” in width
With Kindle: 8.25” in length, 5” in width

Materials
70 yards Valley Yarns Stockbridge in Red Purple
2 circular needles, size 5 (any length)
Stitch marker
About 10” of elastic ribbon, .25” width
Tapestry needle

This pattern uses the two-circular method, but you can also use dpns or Magic Loop if you prefer.

Gauge
4 sts/8 rows= 1" in STRETCHED rib pattern.


COZY

CO 40 sts using Judy’s Magic Cast On.

Work k2, p2 rib in the round on two circulars  until work measures 9” from beginning, unstretched. Place stitch marker at beginning of round.

Elastic band casing:

Rounds 1-4: knit
Round 5: Purl
Rounds 6-10: knit

Bind off loosely. Cut a long tail for sewing seam of elastic band.

Elastic Band:

Cut a 10” length of elastic and shape into a circle with one half inch overlapping on either side, so that the length of the band when folded in half equals 4.5” (9” total). Securely sew ends together. Turn the cozy inside out and position the elastic string around the stockinette band:


Fold the stockinette band over so the two wrong sides are facing. Using a tapestry needle and the tail, sew the bound-off edge to the inside of the cozy. Every few stitches, pause and stretch out the fabric slightly so that the sewn edge isn’t too tight. Weave in ends. If you wish to block, wrap your Kindle in plastic wrap and/or seal it into a ziplock bag and insert it into the cozy to block it into shape.


Ta da!

Thursday, May 19, 2011

raglanagain and utilitarian knitting

After a sort of short hiatus from knitting, I'm back with two raglan sweaters in progress and a finished project which is, frankly, probably the most useful thing I've ever knit. No, well, my camera case was probably the MOST useful thing, but this new object is a close second. More in a bit. Meanwhile, my sweaters:

I started this one almost a month ago now.


It's a sweet little Knitty pattern-- Amiga--  that is very reminiscent of the popular Featherweight cardigan, except it's free, and knit in a heavier weight. But I wanted a light, easy summer sweater, so I cast on using fingering weight baby yarn. I had two skeins of "antique white" (shown above), and another two skeins of bright white. I figured I'd just use both. At first i had the idea of using leftover Palette for the collar/front bands section, because the two yarns looked good together-- the deep turquoise and the white-- but the white is acrylic and the Palette is wool, and it would be a nightmare to wash. So forget that. However, I know how tacky the two white shades would look together, so I've kind of lost my momentum on the project all together, though I know it would be a really cute sweater to have for the warm weather.

The second raglan sweater I just started last night:


How cute is it already? It's called the $5 in Paris sweater and it's meant to cost very little, knit in cheap acrylic. Hey, I'm all in favor of acrylic-- EASY TO WASH!!! I'm not a huge fan of doing laundry, and if an item requires hand-washing, you can pretty much bet it's going to get washed never. Anyway, the sweater is so cute, and it's very much my style, plus, I figured it is the perfect project to bring on my LONG flight on Monday. Unless I get a lot done by then... hm... we'll see. At any rate, it's looking very neat.

And my finished project:


What is it? Can you guess?

Here's a hint...


It's a jewelry stand! Genius! I wish I could say I thought of this, but I got the idea from a friend's Ravelry project page. She made one and my curiosity was piqued. What is this thing? It was SO incredibly quick and easy to make. I had an old frame; I knit a short swath of some Claudia's Hand Paints Fingering in the seafoam pattern, which took NO time at all; covered the cardboard insert with pretty paper; stapled the knitting to the insert; shoved it all into the frame-- and voila! Getting my earrings tangled up is a frequent problem for me, because I like to throw them all into a little box together, and then rattle the box around until the hooks get stuck in the pretty stringy pieces-- like that pink pair right in the middle of the frame-- and then I have to pull them apart and they get ruined and so forth. Right now my solution is keeping the more fragile ones in separate Ziplock bags. But this is a perfect arrangement for me. It's portable, I can set it up wherever I am, my earrings have a pretty home, and no more tangles! Plus, it's just such a cool idea. I'm very happy with it. The one thing I would change is the size. It's a small frame, and I have a lot of earrings, so if I stumble upon a larger cheap frame in the future I might make a bigger one.

And, before I go, a quick non-sequitor: today my dad sent me a very cool article about the rising trend of yarn bombing/knitting graffiti, which is basically exactly what it sounds like: renegade knitters sneaking out in the dark of night to cover things in knitting!!!! I want to get involved in this movement.

I believe that's all the knitting news I have for you today, folks!

Monday, May 16, 2011

I've got the kippot blues

....from my head down to my shoes.

I crocheted my dad a kippa last year, but he recently lost it, very sadly, so I decided to make him a new one. I also recently inherited a bunch of crochet hooks from my Nana, so I decided to make another one, for my friend Ben, in a heavier weight yarn.

With the leftover cotton thread from my kippot-related activities last year, I began a kippa for my dad in cream with variegated blue accents, the same blue I had used to make the original kippa. I started experimenting with color patterns-- I don't really know anything about crochet other than the simple stitch I learned last year, so I was trying to teach myself new tricks. I made a few simple stripes and then a kind of dotted line, with ten stitches in cream, ten in blue, etc., all the way around. I only had a very little bit of blue remaining but I thought I could finish the row. Wrong-- I was just ONE ten-stitch repeat away from having enough. So I used my brain and colored in the string with a blue sharpie. It looked fine-- a little bit smudged but it was okay. I went on and crocheted around and around and round until I was almost finished. Then I cleverly thought to myself, "I'll just clean up the smudge around the Sharpie section with a Tide Pen." However, the results were dismal. It got totally ruined:


I really liked the broken line row of blue.


All smudgy! Ugh. I knew it wasn't THAT bad, but it really irritated me. So I started a new one, with different, thicker thread, and attempted a spiral pattern:


It didn't look too bad but I was getting tired of it and didn't want to continue all the way around, and the fabric was a little stiffer and not as neat-looking as the original kippa. So I abandoned that and went back to the cream one. I ripped back to the beginning of the smudge, which, unfortunately, involved that cool broken-dotted line, and went back to going around and around in the cream. But I worked on the other one for two days to get to where I was, and it's going to take a good few hours to finish up.

Here's the one I'm making for Ben:


I am SO bad at it, really. I can't seem to make it all nice and flat like Shira's. I guess it just takes practice. I have only made three complete kippot in my life. But I just cannot seem to manage to make them flat, even with the three new ones.

Anyway, in other news, Daddy made me new, longer arms for my Swift, and yesterday I sewed a case out of canvas for it:


My first time using my sewing machine in I don't know how long! I forgot how to thread it, and had to look it up online. Ha. But I got it all figured out anyway. The zipper ended up a little bulky at the very end, but otherwise it came out okay. It achieves its function at least-- and now my Swift has a little home.

Sunday, April 24, 2011

My Dad Can Do Anything!

Today I teamed up with my wonderful, gifted, extremely handy father to make my very own Swift! And it worked! We produced a real, live, working, awesome Swift for winding yarn! IT IS THE COOLEST!

Fine Points, the yarn store I worked at in Cleveland, had a cool portable one that disassembled. A few months ago I drew up a similar design for my dad to make (since he can make/fix/do anything). Slowly he worked his way down his enormous list of various things to do around the house and today arrived at making my Swift! It was the first actual nice day of spring. This winter has been brutal, but today was a shorts and tshirt kind of day, so it was the perfect day to be outside, woodworking.

This was my design:

 
Pretty simple. I showed it to my dad, and he thought it reasonable. Today we embarked. And with naught more than a piece of wood and a sophisticated array of power tools, we did it!


Here's my dad hard at work with his table saw.

So first, we discussed our vision for the Swift, and then we started measuring and sketching on the wood. I unwound a skein of yarn and held it out in a square so we'd have an idea of how big it had to be. We took an old piece of wool and re-appropriated it. My vision was thus: two interlocking base pieces which fit together with notches. Two long arms which criss-crossed to form an "x", with several holes drilled in each end to accommodate removeable pegs around which the yarn would be wrapped. To hold the whole thing together, a peg would be fitted into a hole drilled through the midpoint of the two arms and the base pieces. We discussed lengths, widths, aesthetics, and portability, and we (ok, my dad) decided on base pieces which measured 18", with a height of 2.5" at the widest point and 1.5" at the narrowest. Daddy cut up the wood using an ingenious sled thingie that he had made a few years earlier which enabled him to stabilize the wood when he was making diagonal cuts, which is apparently difficult to do on a table saw. But he fixed every problem that arose!

Here was the rough result of the first few cuts:


You can see it starting to take shape.... the notches to ensure a sturdy fit, the sloped edges so the arms would be able to rotate easily. This was originally supposed to be the "practice" version because my dad wanted to make a more perfect one using nicer wood, but that wood ended up being splitty, so it turned out that our practice version was the final version.

Then we did the arms. We decided on a length of 22", with similar notches to lock them into place:


Daddy drilled the hole for the central pivot, and we used a nail to hold it together:


Then we (ok, Daddy) drilled holes for the arms-- three in each arm, spaced by 1.5"-- and I cut a dowel into four 5" pegs. Daddy found a little piece of hardware to put between the base and the arms to enable easy rotation. And we put it all into practice...........


TA DA!!!! A SWIFT!!!!!!!!!!!!!!!

Daddy used some kind of sanding machine to smooth out all the edges, making it look way more finished and professional:


I am SOOOOOOOOOOOOO THRILLED WITH IT!!!!!!!!! How many girls are lucky enough to have daddies that can build them their very own personal Swifts!?????!? I've been playing with it all day long. I can't wait to get a ball winder and put it to use! No longer will I have to wind yarn around my knees/bedpost/an upturned chair!


Witness just how perfectly it works!!!!!!!!!

I am simply ecstatic with how it turned out. It disassembles easily into a few light pieces of wood and some hardware, and I plan on sewing up a canvas case to carry it in. Portable Swift!!


I'm just SOOOO happy with it!! Thank you Daddy! You're simply the best!

Thursday, April 21, 2011

Knit and Knit Again

Anyone who reads my blog regularly knows that I am anything but a fastidious knitter. As far as knitting goes I place myself firmly in the "quick and dirty" category. Missing a stitch in a lace pattern? Pick one up! Got an extra? K2tog! Miscrossed a cable twenty row back? Rip out the ten cable stitches down to the mistake and then re-knit it up to the rest of the work! Something looks a little weird? Look somewhere else! It's a little big? Hide it in the closet! It's a little small? Give it to my mom! I will do pretty much ANYTHING to avoid ripping stuff out.

Which is what makes this post so uncharacteristic of me. Recently I had to frog two items down to the nub and start all over again. Yes, I've done it before-- with my short-sleeved sweater and my lace dress. But with both of those things, I was still in the process of knitting. I was maybe 70% through the sweater and 45% through the dress when I ripped them out. The difference now is that both items were totally complete when I ripped them back-- bound off and everything!!

So what were the things? Well, one of them was my I'm Not Married Slouch. After wearing it for a day or so I noticed that it was excessively loose. When I shook my head quickly it kind of slipped back and forth instead of staying put. The band stretched until it was way big. I guess part of the reason was that the yarn I chose is not very stretchy. The other part was that it was just too big from the beginning. I don't know if I mentioned the fact that I knit and ripped back two entire ribbing bands before I forged ahead into the lace. Both times, the band was way too big. I kept adjusting my numbers and calculations, but I guess I should have tried again. Also, I knit the ribbing with a size four and Magic Loop (which I really don't like), and the gauge was loose. Plus the hat itself was not perfect. While knitting, I had lost/gained stitches pretty often (see above) and so the pattern was a little messy. Since I'm not a perfectionist, I didn't care, but all those things together made it clear that if I left it the way it was, the hat would quickly become yet another thing I never wore.


Sooo.... I ripped. Instead of casting on 116, I cast on 100 and used a size 2 needle for the ribbing, which made it much more snug. I did 15 reps of the vine lace pattern instead of 17, and I counted carefully on every knit row to make sure I hadn't lost (or gained) any stitches. It was finished in a few short hours, and then I had a much better-fitting hat.


See how much happier I look! I really love this hat. It's so cute and springy and artsy looking, like I'm on my way to a poetry slam or something. Of course, if I put my ponytail in it, I look like I should be leading around five little kids in a row.

Second re-knit project: Skew socks from Knitty. I don't know how I missed these socks before, but now that I've discovered them, I have found my new go-to sock pattern! These socks are possibly the coolest. They are knit on the bias-- which is a style I discovered I really like-- and they kind of get all swirly and interesting around the heel. Basically, they are so freaking awesome!!! I decided to use one of my new yarns from Lancaster, so I chose the Knit One, Crochet Too Ty-Dy Sock. I think next time I will use a hand-painted/variegated skein of sock yarn, so the twisty turny nature of the sock will be even better illustrated.

Here is the toe, which gives you an idea of how the whole "bias" thing starts:


The blue area on the upper right is where I cast on, using the Magic Cast on method (really cool-- enables you to start with one row of knitting and split it into two halves, thereby avoiding a seam).  Then the pink slope to the left was the mid-toe, and after a few rows the foot shaping began, requiring decreases at the beginning and end of the round and two increases at the middle of the round. In that way the traditional rectangular foot is shaped while still knitting diagonally. So, so very cool.


For the first sock, I decided to use my 32" size 2 circular and the Magic Loop method, which I had never used on a sock before, since my two Addi's were in another project. So this sock was a first in a few ways-- it was also the very first toe-up sock I've ever made. Do I like the toe-up method? I dunno. It was cool to start with the toe, but it gets kind of tedious up around the calf ribbing. Anyway, I cast on and went to it, but I hit a few snags immediately. I misread the pattern and ended up making the toe way too long, so I had to rip that back. Then when I got to the ankle shaping I realized I had two few stitches, so I had to improvise some increases. Then, after I had finished the ankle shaping and mini-gusset, I realized the sock was ENORMOUS and I had to rip the foot back about three inches. The pattern was written for a size 8.5 foot. I am a size 8. I thought it wouldn't matter, but considering my loose gauge, it did. The pattern called for the foot to be knit to 7.5" before ankle shaping. It was unreasonably big on me so I ripped back until the foot measured 6". Anyway, I eventually got past the ankle shaping and gusset (for the third time!) and reached the cool heel, which involved grafting. Until the heel, I thought the sock was just going to be too big, period. After the heel, I realized how the whole thing came together and it was freaking awesome. I finished it up quickly. Since it's knit on the bias it was SO much faster than a traditional sock, despite the different sections of special increases and decreases and so on. The slowest part was the ribbing at the end, which was the only part knit straight.


Look at that awesome swirly heel!

But the sock was still too big. It was loose on my foot, partly because I had made the foot too long, partly because of the loose tension with Magic Loop, and partly because of the messy increases on the ankle/gusset. I decided to knit the right foot with two circulars (put the other thing on a holder and used my Addi's. LOVE those little guys) and started the ankle shaping at 5.5" instead of 6". I also followed the pattern extremely closely and it came out looking great and fitting much better. See:


The one on the right was the first sock I made, obviously, and the one on the left was the second. It was obvious that I had to rip back the first one and re-do it. So rip I did. I ripped back to the point where the green stripe started so that I could match up the striping on both socks, make them semi-symmetrical. I went to work on my second left sock and finished in a day or so. (I'm telling you, these socks were SO QUICK.) Here they are this morning all done!


The striping didn't match up perfectly. The left sock lagged a little bit behind the right, color-wise, so the ribbing ended up a different color, but overall they look pretty matchey and they fit really well. Not perfectly, they are still a little bit loose, but I really love them nonetheless, and I would make them again and again and again. If I need to whip up a quick pair of socks this would be my go-to pattern. SO MUCH quicker than regular ol' socks.


Love that crazy heel.


I am just so impressed with this pattern-- it's so smart and well-written. I love it so much. Definitely worth re-knitting. Now I am done with all current projects! Need something new... As usual.

Monday, April 11, 2011

Amish Knitting

Okay, there's really nothing Amish about this post other than the fact that the things I'm going to talk about originated from Amish Land! Otherwise known as Lancaster, PA. I went there this weekend with my family and can you guess what I found?! That's right, a YARN SHOP! It was my first destination. I dragged the whole family there, straight from the three-hour car ride from New York. To be honest, this weekend in Amish Country involved a lot more shopping than Amish, but I am not complaining. I got a lot of cool stuff, and I got to ride in a buggy to boot!

So first allow me to present my lovely yarn store finds.....

Knit One, Crochet Too Crock-O-Dye. 416 yards, fingering weight, 65% superwash wool, 20% nylon, 15% silk.

This is a really pretty yarn. It's very soft, and it is painted in shades of gorgeous pink. I do love my pink. This wasn't a hard one to choose.


Knit One Crochet Too Ty-Dy Socks. 436 yards, 80% superwash wool, 20% nylon. To be honest, what most appealed to me about this yarn was the fact that it was 436 yards of sock yarn in one ball, winding not needed!! I realize that's a stupid reason. But these will make cute socks. I have never actually made myself a pair of socks-- well, I have, Karira, but I've never worn them because they're too nice. So I've never made myself a pair of wearable socks. And there are a few cute patterns on Ravelry that I would like to try. So, could be a cute project! Took me a loong time to choose the colorway. In the past I've bought yarn that didn't immediately appeal to me color-wise because I thought to myself, "Hey, maybe I'll make something for (some other person) and they would not like to have bright pink socks like I personally would prefer. And I don't have any brown yarn. So I'll get this nice, sedate brown." But what ends up happening is a few months later I'm like, "Yuck, I hate this brown, why did I ever get it?", and so on. So I've decided to give up trying to shop for future projects for other people because I won't end up making them anyway, and from now on I will shop purely for myself.


Blue Heron Rayon Metallic, 550 yards. Ravelry claims it is worsted weight but it really doesn't seem like it. It seems much finer, like DK or sport. Definitely not worsted. But anyway, this one has a story. I originally just bought the two skeins pictured above, and walked out with a smile on my face. But I kept thinking about the above yarn because I used it once before and it was sooooooooooooooooooo gorgeous. I made this:


It's a little shrug that, to be honest, doesn't fit me so well. It's very small on me. But it's SO gorgeous-- the drape of this yarn is truly art. Doesn't wrinkle. Feels like water running through your fingers. I've worn it to some events. And I just love it. The color, the sparkles, everything. I bought that yarn after literally thirty minutes of deliberating because of the cost-- $44-- more than I had ever spent on a skein of yarn before in my life up to that point. But it was also the first truly premium yarn that I had used. I had bought pretty wool before, but it was also pretty scratchy. This was soft, such a pleasure to knit with, and beautiful.

So I went back and got it.

 Not a clue what I will use it for. But whatever it is, it will be beautiful.


I also got this cool contraption, at a crafty Amishy store where real Amish people buy stuff:
It's a snap-putter-on-er!

Witness:

It squeezes real snaps onto fabric. I thought I could use it on my knitted iPod/blackberry cases to make them look more professional, since the sew-on snaps look kind of homemade and they never seem very secure. When we were still away I tested it on a shirt with the above results. The first try, however, ripped the fabric when I tried to unsnap the snap, because the fabric was too thin. It worked (above) when I did it on two layers of fabric.

 The doohickey can also make eyelets/grommets! See:

This was a way-cool feature. But the real question remained: would this work on knitted fabric? If not, then it could not do me much good.

 So today I attempted to put it on a wrap-around sweater that won't stay closed, with the following results:

You probably can't tell, but these are the destroyed prongs of at least a dozen snaps that I tried to snap on to the sweater. This was bad news. I would squeeze the gun thing on the knit fabric, but it simply wasn't creating a snap-- just bending all the prongs out of place and rendering them unusable. I was getting a little uneasy when I tried putting one of the little metal thingies in the OTHER way-- the opposite way advised on the packaging-- and it worked pretty much perfectly!


I tried it on a swatch from another project, just to make sure-- and it worked fine. Then I tried a grommet, but that didn't work as well:


Because putting in a grommet requires punching a hole in the fabric, it is not the best for knit stuff, which cannot really handle holes that well. I tried a few different things and I may have figured out a way I can do it-- if I insert the grommet through a natural gap in the fabric instead of punching a hole-- but it still rips the yarn a bit. If the metal grasps tightly enough to the yarn it's fine, but still risky.

However-- point is, I got it working and now it's a really cool tool to make my stuff look way professional!

I also worked on a hat I started a few days ago when I was away in Amishtown, and I finished it tonight:


I call it my "I'm Not Married Hat", because it really makes me look married, but it's very pretty and funky looking. Makes me seem all literary and cool (which of course I am, but this is not often obvious by my fashion choices). Still, if/when I wear it in Israel, it's as good as wearing a wedding ring and gaining thirty pounds. It screams MARRIED MARRIED MARRIED!!! I will have to be careful. Of course, it could also be useful in warding off the TONS of attention I get from religious guys hitting on me.... ha hahahahahahahhaha....haha. Hahaha. I guess it would be interesting to see if people treated me differently because of it. Maybe it can be my "Social Experiment Hat."